
When I first saw this Spiral Dye background stamp in the Stampin’ Up! Annual Catalog, I knew I wanted to make a “flower power” themed card. The Color & Contour bundle was the perfect set to pair with the Spiral Dye stamp for this groovy “tie dye” card.
Supplies:
- Spiral Dye stamp
- Color & Contour bundle
- Polished Pink & Mango Melody Ink Pads
- Polished Pink, Mango Melody and Basic White cardstock
- Stamperatus
- 2021-2023 In Color Jewels
- Dimensionals
- Stampin’ Seal
Directions:
I started by cutting my cardstock. I cut Mango Melody at 8 1/2” x 5 1/2” and scored it in half for the card base. Then I cut a piece of Polished Pink at 5 1/4” x 4” and lastly Basic White a little larger than 5 1/8” x 3 7/8” (we will cut it down after stamping) and another piece at 5 1/4” x 4” for the inside.
Next, I took my cut piece of Basic White and centered it on my Stamperatus and marked the edges. I laid my Spiral Dye stamp on the center of my white cardstock and picked it up with the Stamparatus. I inked it with Polished Pink and stamped the image.

Then I flipped the stamped white cardstock 180 degrees, cleaned my Spiral Dye stamp with a baby wipe and inked it with Mango Melody before I stamped the image again.
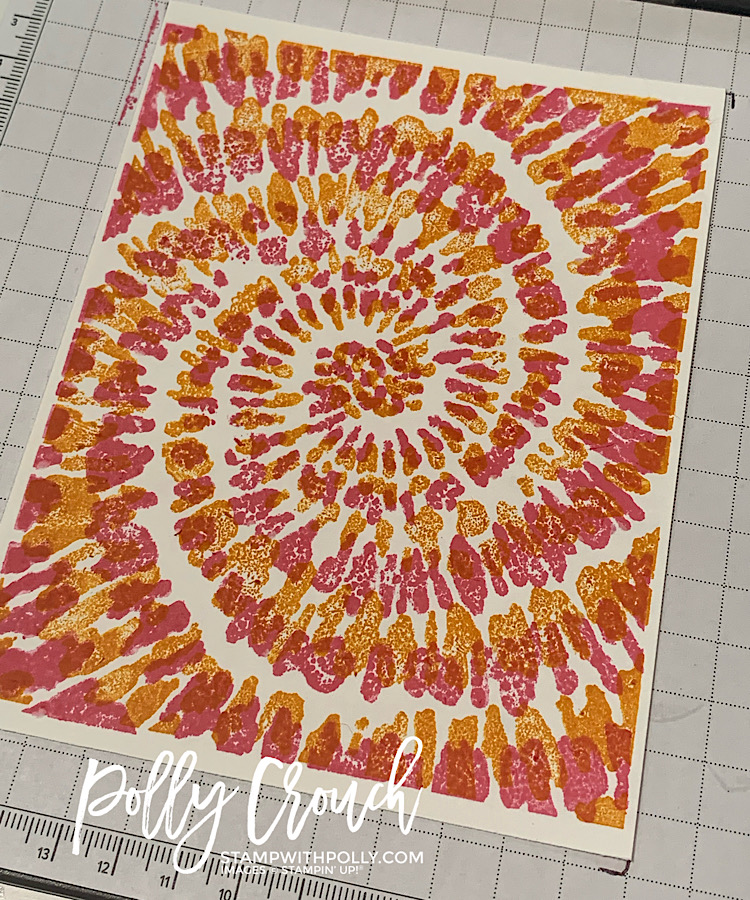
I trimmed the finished Spiral Dye background to 5 1/8” x 3 7/8” before layering it on top of the Polished Pink cardstock with Stampin’ Seal and then finally onto my Mango Melody card base.
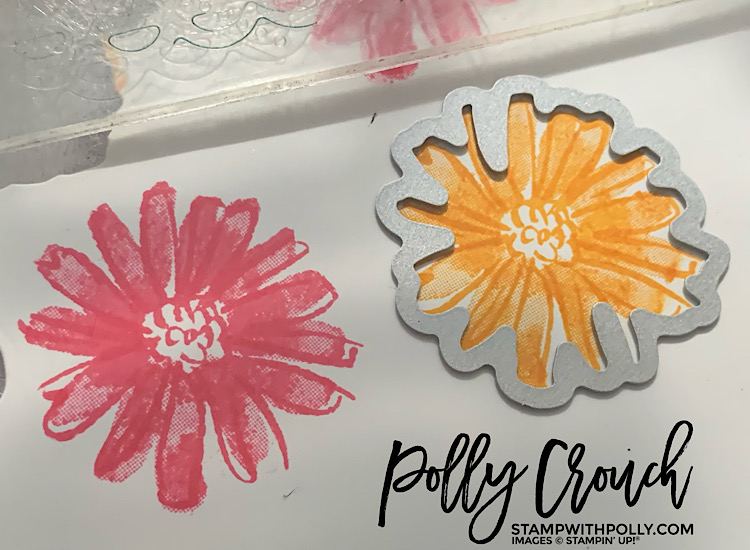
Next, I stamped my flowers. I used the 2-step daisy flowers and stamped one of each in Mango Melody and Polished Pink on a scrap piece of paper before using the coordinating dies to cut them out.
I also stamped one of each of the flowers in the corner of the 5 1/4” x 4” white cardstock for the inside of the card. I also stamped the sentiment in Polished Pink on a scrap piece of paper before using the smallest rectangular scalloped die from the Color & Contour bundle.

Finally, I attached the sentiment and flowers to the center of my card with dimensionals. I finished the card by adding three In Color jewels to the center of each flower.
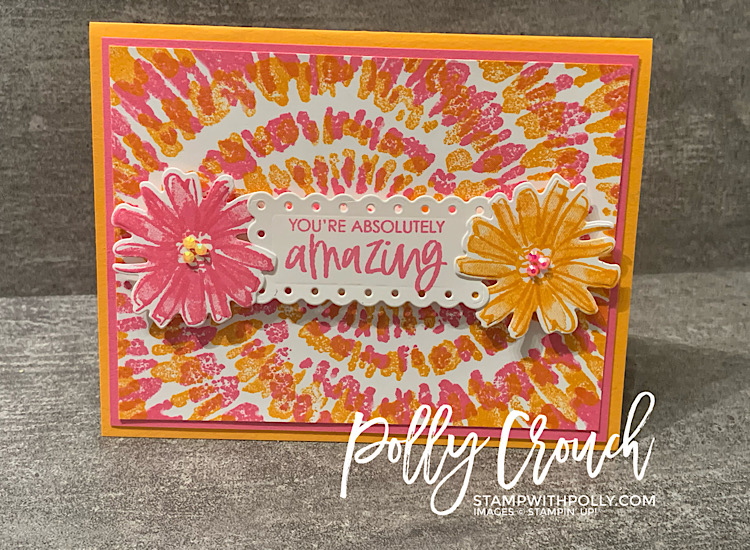
Such a fun card! I love this color combo but can’t wait to try some other color combinations. Leave me a comment and let me know what you think!
If you love bright bold cards, be sure to check out my Make Your Own DSP blog post here.
Stamp with Polly
Leave a Reply